
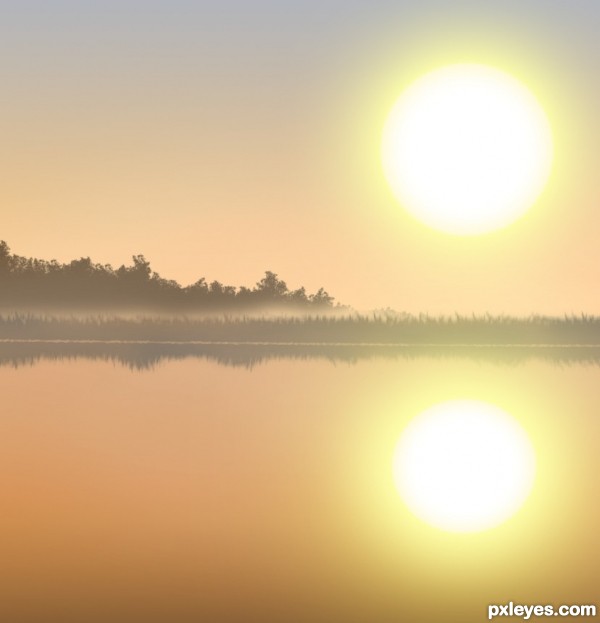
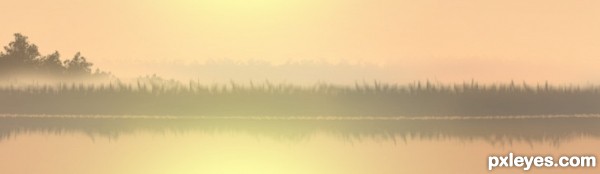
With the help of photoshop, you can not only edit photos and images, but also create a very realistic landscape, water, trees and a sun. We'll be doing all of this from scratch... Let's get started!
Width: 1920px Height: 1200px, 72 pixels per inch.
Choose Gradient tool (Press G)
In the upper panel settings click on the imgnail of the gradient.

#a1b1ca (Sky)
#ffc16e
#d38844 (Reed)
#c48446 (River)
#141412
The color code is entered here
Outer Glow
Blend Mode: Normal
Opacity: 100%
Noise: 0%
color: #feffac
Technique: Softer
Spread: 0%
Size: 155px
Contour: Default
Range: 40%
Jitter: 0%
All settings by defaults, only change
Blending mode: Normal
Color: #fff7c4
Elements Size: 43px

Spacing: 25%
Scatter: 0%
Count: 1

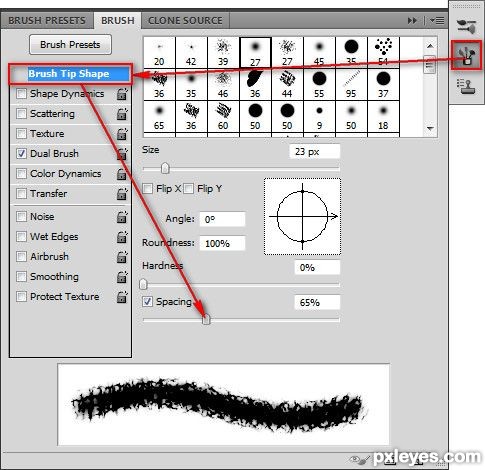
Brush Tip Shape
Size: 3px
Spacing: 60%
Dual Brush
Spacing: 80%
Scatter: 0%
Count: 1
Brush color #f8c27a

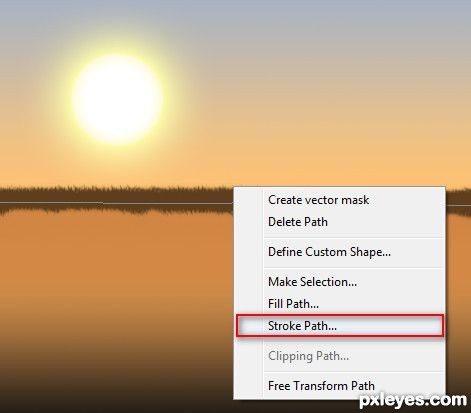
Select Stroke Path...

Right click on the layer name and select Duplicate Layer...
Transform the new layer to a smart object.
Layer > Smart Objects > Convert to Smart Object
Outer Glow
Color: #ffff3e
Size: 250px

Peel using the "Eraser" tool upper and lower part.
Brush Properties
Size: 1000px
Hardness: 0%
Leaving only the central strip of fog.
Set the type of blending: Divide
Set the type of blending: Pin Light, Transparency - 60%
Set the type of blending: Brightness.
Color: #4a2b09
Size is arbitrary. Hardness: 0%
Brush Color: #bf906c
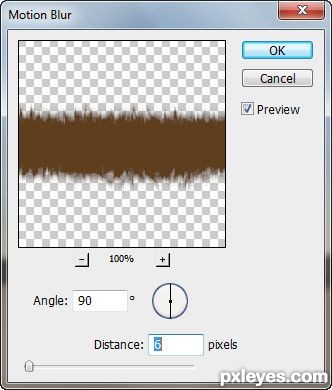
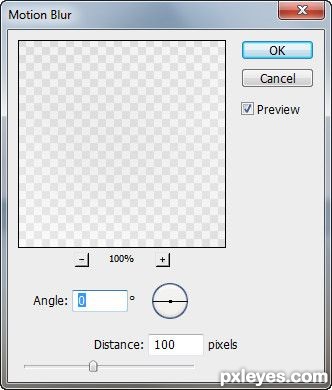
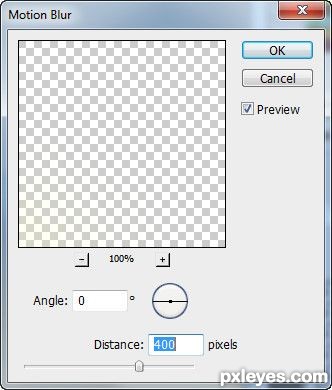
And again, we use the well-known to us Filter > Blur > Motion Blur...
Make a blur on the layer "Reed" gently wiping the border, taking away too much sharpness, a previously created line.
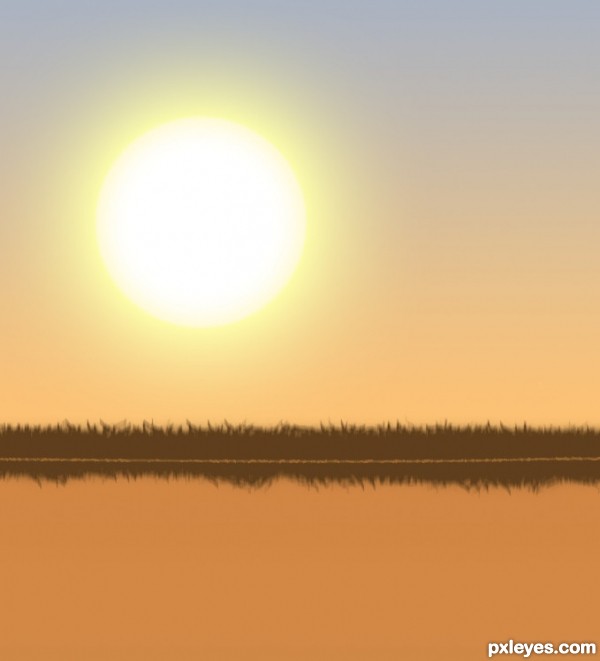
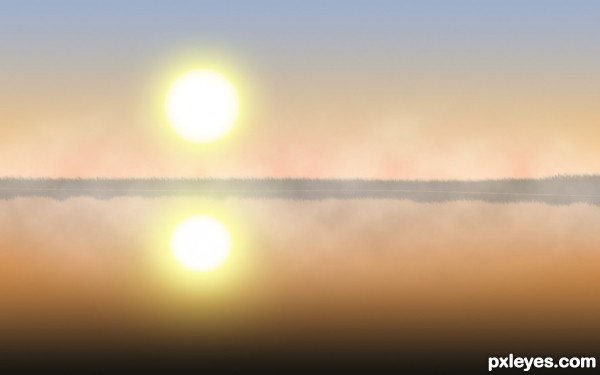
End result:
Step 1
Create a new image from the menu File > New... (Ctrl + N)Width: 1920px Height: 1200px, 72 pixels per inch.
Step 2
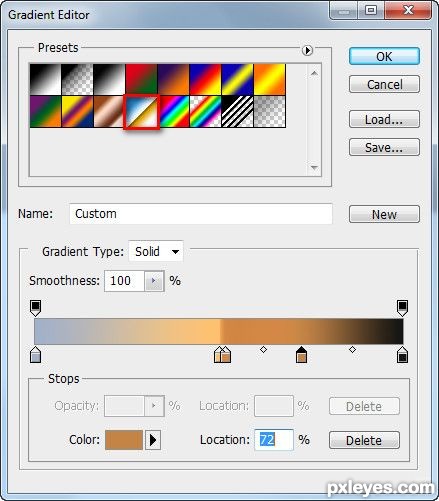
2. Fill the image gradient background.Choose Gradient tool (Press G)
In the upper panel settings click on the imgnail of the gradient.
Step 3
For our image fits the pattern "Chrome"Step 4
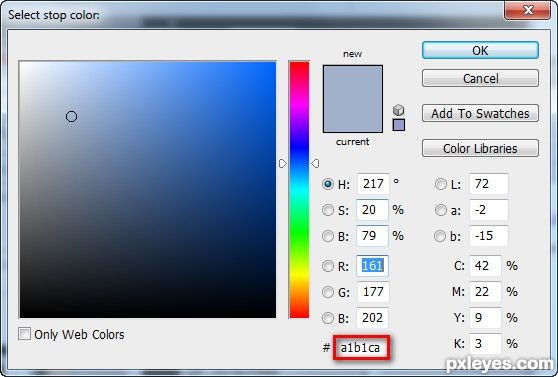
We arrange the colors by double clicking the left mouse button on the color slider in the following order (from left to right)#a1b1ca (Sky)
#ffc16e
#d38844 (Reed)
#c48446 (River)
#141412
The color code is entered here
Step 5
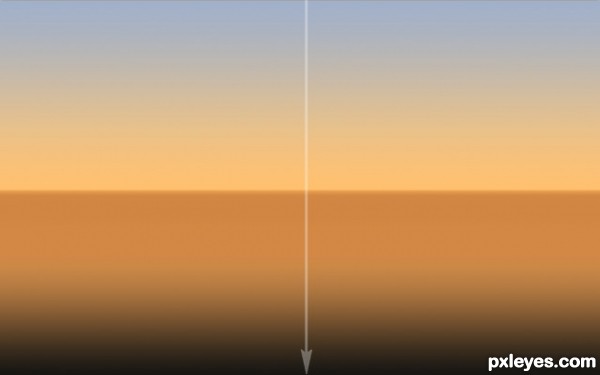
Press and hold the left mouse button at the top of the workspace, and then we press the "Shift" key and hold the mouse down the line, after the release the left mouse button to fill.Step 6
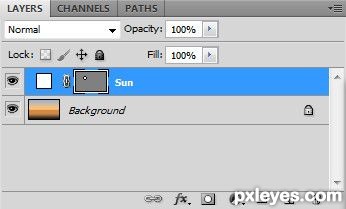
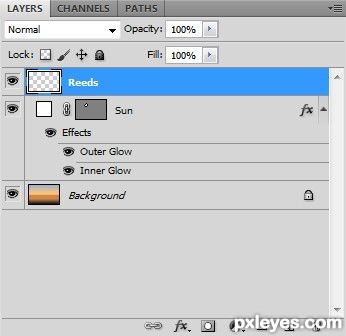
Create a new layer on which we will settle the "Sun"Step 7
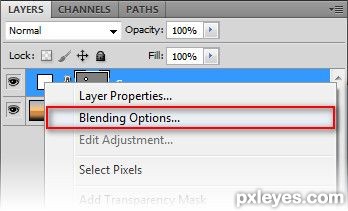
Will create a circle of white color, add effects to it. Right click the layer imgnail and select Blending Options...Step 8
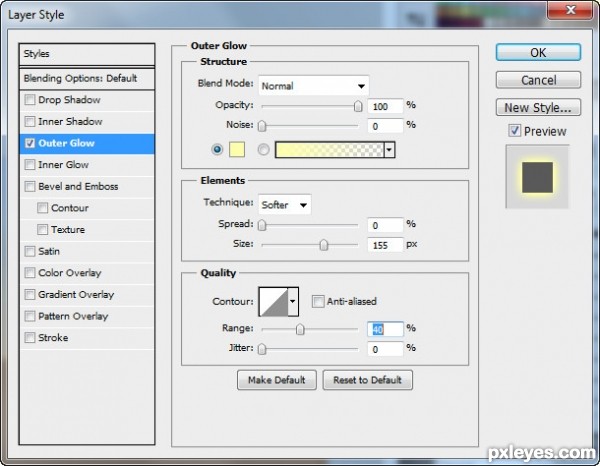
Settings are as follows:Outer Glow
Blend Mode: Normal
Opacity: 100%
Noise: 0%
color: #feffac
Technique: Softer
Spread: 0%
Size: 155px
Contour: Default
Range: 40%
Jitter: 0%
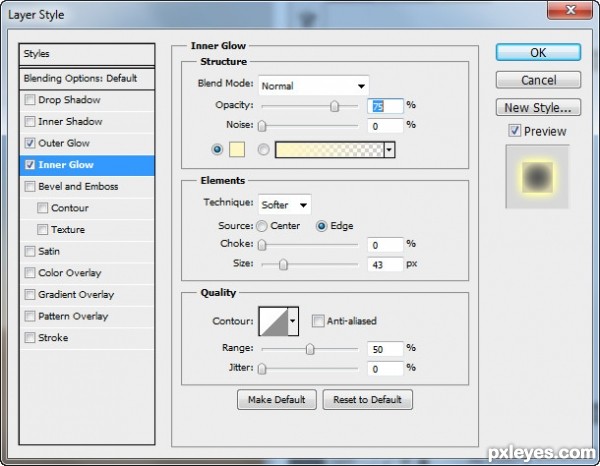
Step 9
Inner GlowAll settings by defaults, only change
Blending mode: Normal
Color: #fff7c4
Elements Size: 43px
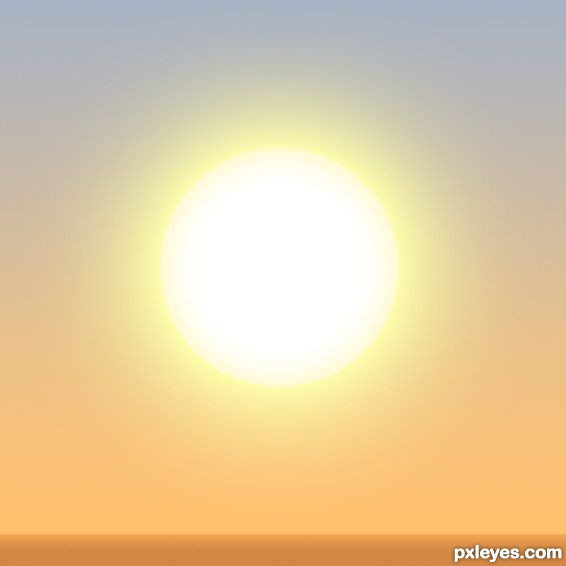
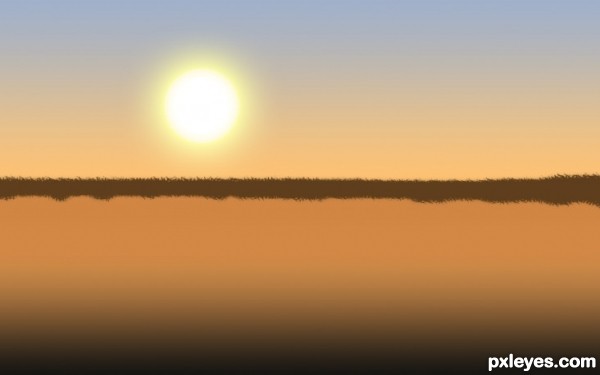
Step 10
We get here is the sunStep 11
Let's create a layer of reeds.Step 12
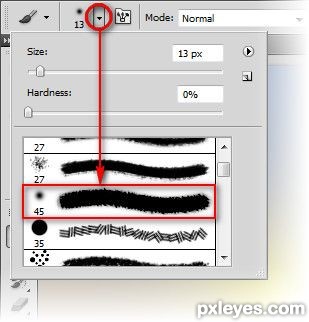
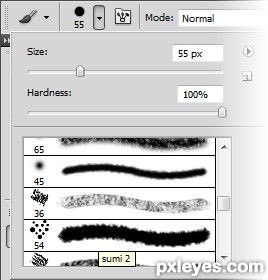
Choosing a set of brushesStep 13
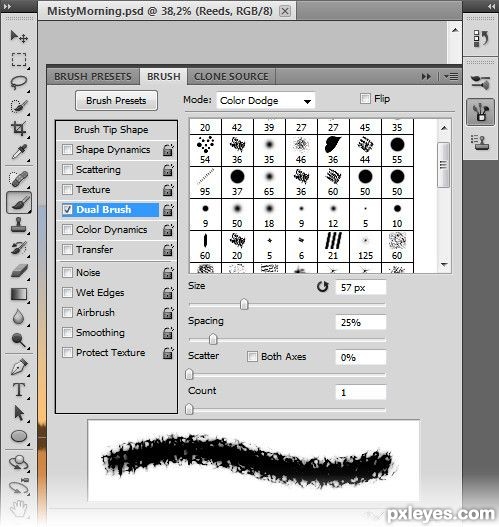
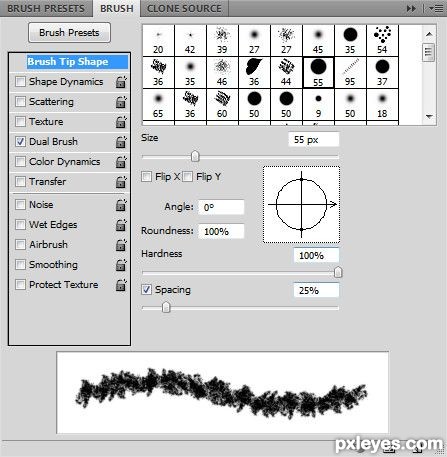
Select brush "close cross hatch"Step 14
In setting the brush mode Dual BrushSpacing: 25%
Scatter: 0%
Count: 1
Step 15
Color for the brush, I took #5e3e1cStep 16
Now changing the size of the brush draw a line rushes, by pressing "[" and "]"Step 17
Apply Filter > Blur > Motion Blur...Step 18
Take the Brush tool (press B), and set in the settingsBrush Tip Shape
Size: 3px
Spacing: 60%
Dual Brush
Spacing: 80%
Scatter: 0%
Count: 1
Step 19
Draw the coastline, with the Pen tool (press P).Brush color #f8c27a
Step 20
Right-click on the workspace.Select Stroke Path...
Step 21
Select Brush and activate checkbox Simulate PressureStep 22
Obtain the shorelineStep 23
With the tools "Dodge Tool" and "Burn Tool" are doing uneven illumination of reeds. I used the settings "Midtones" in the top toolbar.Step 24
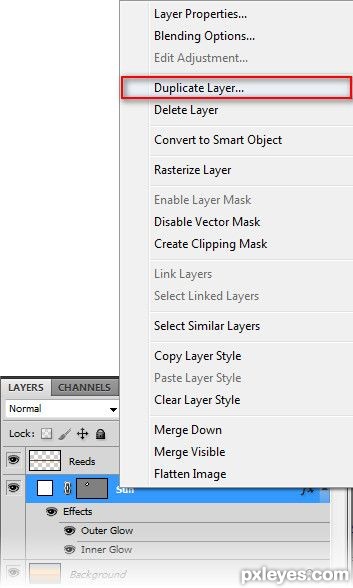
Let's create a reflection of the sun in the water. Duplicate the existing layer "Sun"Right click on the layer name and select Duplicate Layer...
Step 25
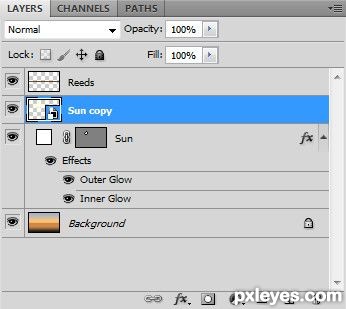
Name the layer "Sun copy"Transform the new layer to a smart object.
Layer > Smart Objects > Convert to Smart Object
Step 26
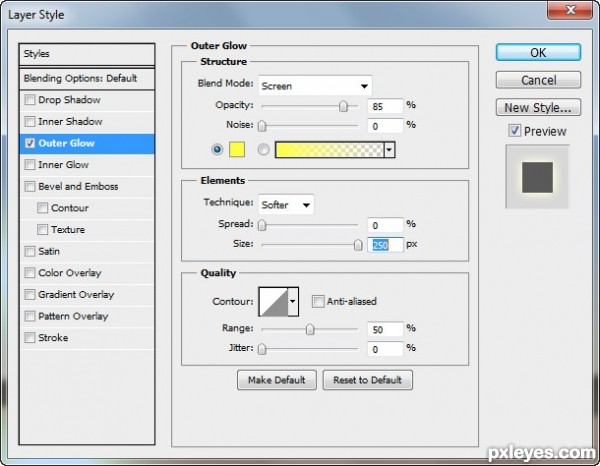
Select Layer > Layer style > Blending Options...Outer Glow
Color: #ffff3e
Size: 250px
Step 27
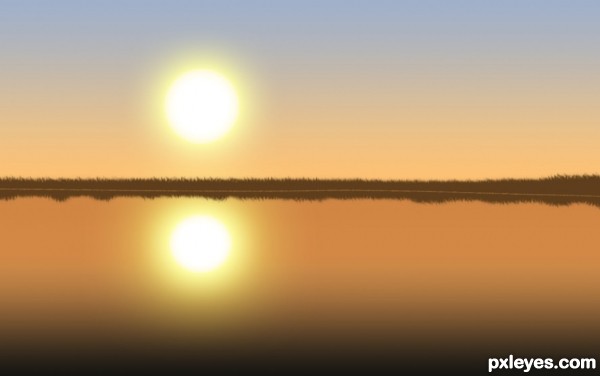
Reduce the size of the sun, about one-third, you can even double. And a little squashed vertically. Actions are performed in the "Free Transform" (shortcut Ctrl + T)Step 28
5. Create a layer "Fog".Step 29
In the color palette set the foreground color of light gray background - white.Step 30
Use Filter > Render > CloudsPeel using the "Eraser" tool upper and lower part.
Brush Properties
Size: 1000px
Hardness: 0%
Leaving only the central strip of fog.
Set the type of blending: Divide
Step 31
Apply Filter > Blur > Motion Blur... this time on the horizontalStep 32
Duplicate the layer with the fog.Set the type of blending: Pin Light, Transparency - 60%
Step 33
Create a new layer called "Forest".Set the type of blending: Brightness.
Step 34
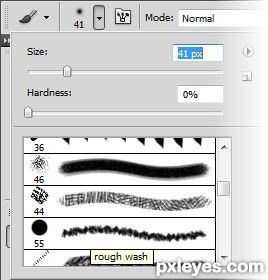
(Press B) select brush "Rough Wash" set "М Brushes"Color: #4a2b09
Step 35
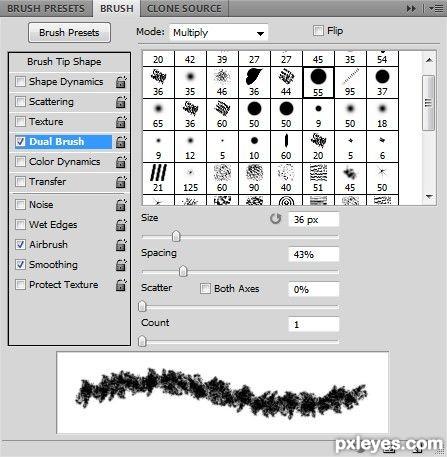
Change settings brushStep 36
And change settingsStep 37
The lower part of trees, obliterated the Eraser tool, to give the appearance of fogSize is arbitrary. Hardness: 0%
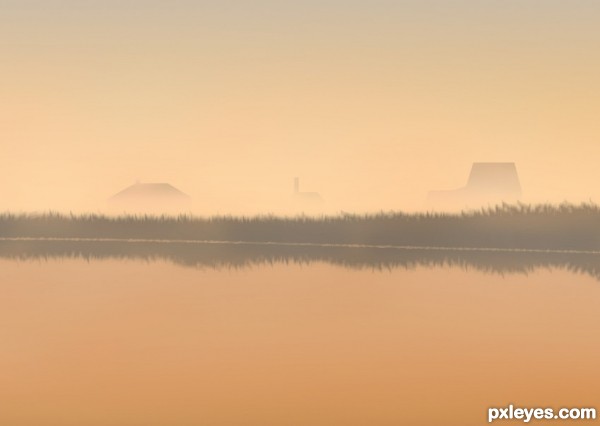
Step 38
Add a layer call it "Village" Opacity: 50%Step 39
You can paint them with the figures (Press U) followed by transformation (Ctrl+T) or Pen Tool (Press P). Then all the layers, with the figures for houses merged into one and treated the "Eraser" tool. Remove the lower parts of houses (as well as removed on the "Forest") this gives the effect of enveloping mist.Brush Color: #bf906c
Step 40
Distant horizont. Add a new layer. Paint brush on it "sumi2"Step 41
Color: #cb9c6cStep 42
Final stage. Strengthening sunlight. Duplicate the layer with the reflection of the sun in the water "Sun Copy".And again, we use the well-known to us Filter > Blur > Motion Blur...
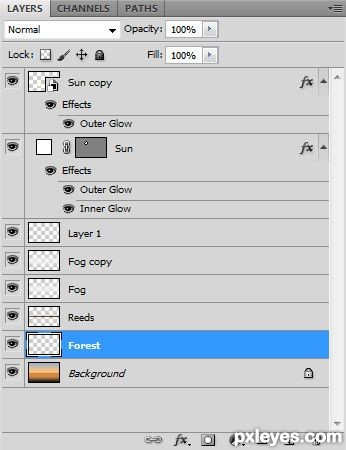
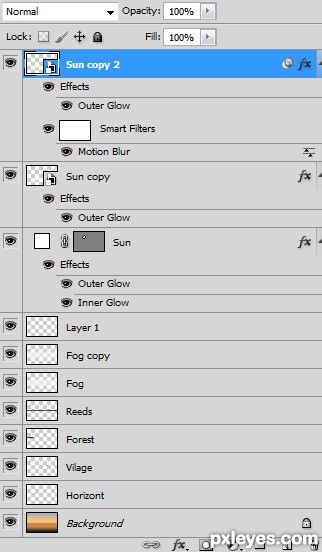
Step 43
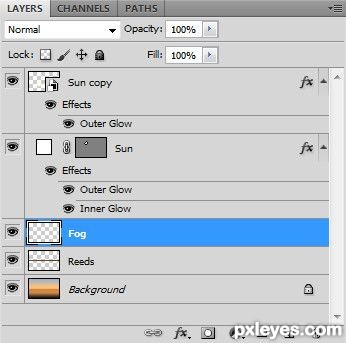
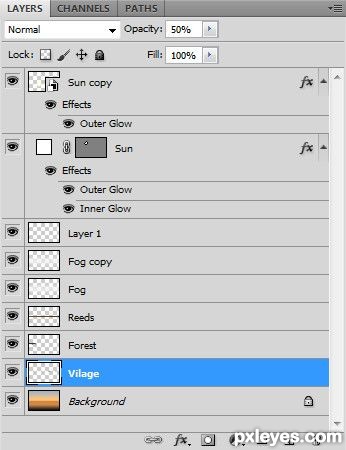
Layers have to be in the following orderStep 44
Lapping the shoreline. is produced using tool "Smudge"Make a blur on the layer "Reed" gently wiping the border, taking away too much sharpness, a previously created line.
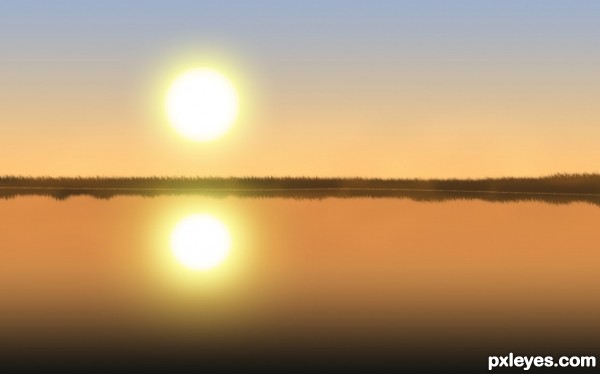
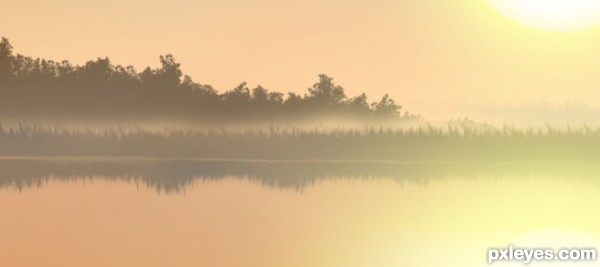
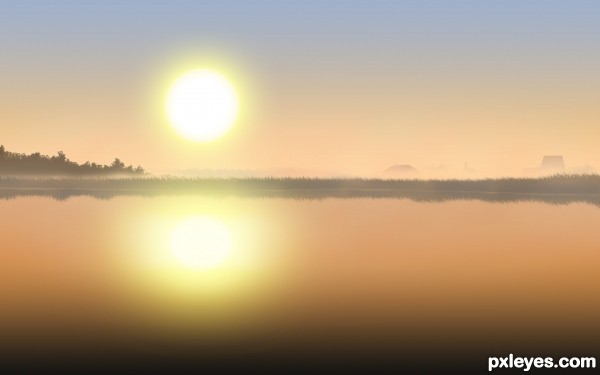
Step 45
Final resultSharing is Sexy !


0 comments: